Monday, June 27, 2011

Me Versus the Pests: Green Acres Weekend Update

For the past two weeks, I've been waging some serious warfare against garden pests.  Since we're not using pesticides, the alternative is to spend time in the garden inspecting the plants and making sure they're not becoming breakfast/lunch/dinner/snack for various and sundry not-so-beneficial insects.  Here are a couple culprits I've battled so far:

Squash Bug by whitney5544
Squash bugs hide under the leaves of squash plants (especially my cucumbers and zucchini), lay their tiny orange eggs on the tops and bottoms of the leaves, and suck the life out of the plants.  I picked these off by hand and dropped them into a coffee can filled with water.  I also scraped the eggs off the leaves and easily squished their evil spawn (which are tiny and white). 
(Photo credit:  whitney5544 on Flickr)
  
In early summer, squash bugs lay their eggs in neat groups directly onto the leaves of the plants.  The key to managing these pests is to destroy them early on, and to plant more than you need just in case you miss a few.  Once the plants get larger, they are much tougher to inspect for pests. 
Another culprit I've found is the tomato hornworm.  Again, I just picked these off by hand, and they're not as prolific as the squash bugs.  A telltale sign of the tomato hornworm are missing leaves from your plants, and they blend in with the foliage very well, so you have to look for them carefully.  Here's a photo:

Tomato Hornworms by Clampants
(Photo credit:  Clampants on Flickr)
I didn't take photos, but I also picked off some red caterpillar-looking things on the apple trees.  For a spray, I tried combining 2 tbsp of Dr. Bronner's peppermint soap to a gallon of water, but I have yet to see the effectiveness of this method.  So the battle rages on...

Now for the weeds...

Friday, June 24, 2011

Maifold Rain Barrel System Part II

Sometimes you have to learn the hard way.

Before I continue describing my manifold rain barrel system, I want to address a couple problems I encountered during our first rain storm.  First, 2.5" of rain filled the ENTIRE SYSTEM.  That's 220 gallons of water, folks.  Granted, we have quite a bit of roof surface, but I did not expect all the barrels to be full.  So why is that a problem?  Well, in essence it's not.  But it caused a few issues that I'm still trying to address.

When the rain woke me up at 4 a.m. last week, I went outside to find that not only was the receptor barrel overflowing, it had also tipped back against the house!  Byron and I were able to tip it back into position, but we had to shim it with some wood scraps to keep it upright.  So note to self: do not wait to install overflow pipe, which should be the same size as the intake.  In other words, if you're feeding your system with a 3x4 downspout, your overflow pipe should be about 12 square inches, too.  I bought a 4" round PVC pipe for this purpose.

Another problem I'm encountering are slow leaks in the bottoms of three of the barrels, which I attribute to the barrel design and the placement of the PVC drain at the bottom of the barrel.  Click here to see my previous post.  See how I put the drain right along that seam?  BAD IDEA.  I'm not a structural engineer, but I was an architect and I should have known better.  I'm still kicking myself for that, especially since I've tried to fix the problem with both RTV and plumber's putty, and have failed with both.  I'm going to browse the hardware store today and call my dad to see if there's anything else out there that can help, but I'm probably going to have to drain the system, plug the hole, and re-install the drain along the higher rim of the bottom of the barrel.  Like I said, sometimes I learn the hard way.

Anyway, for what it's worth, here's the rest of my design (again, you might want to look at this post first):


The rim height on the bottoms of the barrels varied slightly, so I measured each before cutting the piping section that would attach the elbow to ensure that everything would be level.

Once the elbows were installed, I placed a barrel on the concrete blocks and measured how far I would need to cut the sections of PVC to extend out.  This is, in essence, a cantilever and it sags a bit...something that can be remedied either by supports or moving the drain to the outer rim of the barrel.

The four "extender" sections need to be the same length.

Here the extender is installed, along with the elbow for the last barrel (make sure it points the correct way)!

The other three barrels looked like this.

And here they are, set up.

Before cutting more sections of PVC, I checked to see how level everything was...and it looked good!  See?  I did something right!

After measuring each section (don't assume they are all the same), I installed each.

Hint: it's easier to install the downspout to the connector piece before installing it onto the system.  That way, you can ensure that the downspout will be pointing down.

Almost done...and a five gallon bucket almost fits under the spout.  From the videos, I thought two cement blocks would do the trick, but when I repair the system I'm going to prop the barrels up a bit more.  PVC is flexible, but if you finagle it too much it might snap.
Another note...I used RTV on all the threaded joints, and PVC cement on the non-threaded joints.

And again, to be continued...

Monday, June 20, 2011

What I Would Ask Laura Ingalls Wilder: Green Acres Weekend Update

Our big dilemma this week has been when to wean our 6-week-old calves off milk replacer.  Last Saturday we took a 20+ mile drive out to a co-op to buy three more bags, and found that the price had gone up $12 per bag!  While we don't want to skimp and want to ensure that the calves get the protein they need, we also need to consider the financial viability of raising beef cattle in this manner.

From all the research we've done, the industry standard is to wean the calves at around six weeks.  By this time, the calves should have been on something called "calf starter," which is grain, and cheaper than milk replacer.  After they're weaned, their calf starter ration increases and continues until they're about six months old, at which time they're put on pasture.  The crux of this method seems to be the claim that the calf's rumen is not fully developed at birth, and they are therefore not able to get the nutrients they need from grass.

So the questions that remain are:
1. When is a cow's rumen "developed" enough to put them on pasture?  I couldn't find a definite answer anywhere.  Our calves have been eating grass since they were about two weeks old, and they're very healthy.
2. When can we wean them from milk replacer?  Cows are not designed to eat grain, so we're not going the route of calf starter.

In one of the Little House on the Prairie books, one of Laura's chores is to milk the cow and then reserve some of the milk to feed to the baby calf, who has been separated from the mother so that the family can have milk, too.  This is a method we are thinking of implementing at some point, but no one does this anymore.  Left with the mother, a calf might nurse for a year!  But how long did Laura go through this process?  I imagine they didn't feed the cows any grain back then, and cows can get protein from being on rotated pasture (another method used in the old days...in the form of picket lines instead of portable electric fencing).  It's unfortunate that these ways have been lost to current generations.  Since Laura and those of her generation have all passed, we feel that these methods need to be rediscovered by those of us without much experience or animal science degrees, but who believe that cows are designed to eat grass, not grain.

If anyone out there has been in our shoes, I'd love some advice!

This week we also completed the portable hen house, which we're currently using as a brooder:

At 4:00 a.m. Sunday morning, we discovered a couple roof leaks.  I picked up some metal roofing caulk yesterday, which we hope will remedy the problem.
Speaking of chicks, they are one week old now and are developing adult feathers and getting big, especially the Cornish Cross.  In fact, these meat birds are so lazy that they sometimes sit down while they eat!  We also think we found a nice home for Napoleon...we'll be transferring him to his final place of exile on Wednesday.  And despite the brooder lamp burning out sometime early this morning (always have an extra bulb or two!), we've only lost one Cornish Cross, who just dropped dead for no apparent reason the second day we had them.

This week I will try to sneak in a blog or two about the rain barrels.  We got 2.5" of rain the other night, which FILLED THE ENTIRE SYSTEM...220 GALLONS!  In fact, the intake barrel got so heavy that it tipped back against the house and I gave myself a nice slap on the hand for blowing off installing the overflow spout.

I've also spent some quality time trying to eradicate squash bugs and their evil little eggs in the garden...more on that later.

I'm linking up with Homestead Revival's Barn Hop...click the button below to check it out!

Friday, June 17, 2011

If Napoleon Bonaparte Had Been a Chicken...

...he would have been our Mystery Chicken.  When we ordered the broilers and hens, we had the option of getting a "free, rare, exotic bird" that would delight us.  And who wouldn't want to be delighted by a rare, exotic bird???  So with much anticipation, we looked forward to the arrival of this little apple of our eyes. 

At first, Mystery Chicken seemed to be the runt. He (I'm 99% sure he's a Dominique rooster) is smaller than the rest and is actually pretty chill when you pick him up.  But toward the end of the first day, we noticed him making the rounds: he would go from chick to chick, pecking especially at the Rhode Island Red hens.  By day two, Byron observed that he was actually pulling feathers out of the other chicks.  We determined he had Short Man's Complex and dubbed him Napoleon for his incessant bullying of the populace.

Concerned that he would injure the others, we tried a couple different tactics.  Solution #1 was to send him on a campaign back to the hatchery, but we ditched that idea.  Solution #2 was to exile him to the Chicken Island of Elba, which came in the form of an Amazon.com box.  No sooner had we placed him in isolation than he leaped out of the box in a flurry of black to resume his dictatorial reign.  Solution #3 was divide and conquer.  We installed a piece of cardboard to divide the brooder and placed him with the Cornish Cross birds, which are bigger and will sometimes peck back when he disturbs their incessant gestation.  Let them eat cake?  They've heard that before, Napoleon.

Truthfully, we are concerned with the little dictator.  If he keeps it up, Solution #4 may be to put him up for grabs on craigslist.  Solution #5 is to exile him to the Barred Rock hens in hopes that one would adopt him.  Solution #6 involves the cat's version of Waterloo.  Kidding.  I think.

Emperor Napoleon the Chicken

Divide and Conquer.  However, we moved the chicks to the outdoor brooder last night and again, it's a free-for-all for the little dictator.
Any advice on dealing with a chick who is desperately trying to declare himself Emperor of the Brooder?

Wednesday, June 15, 2011

Manifold Rain Barrel System Part One

As promised, here is Part One of my myriad and detailed posts regarding the manifold rain barrel system I made.  Before proceeding, you may want to take a look here, a former post in which I wrote a little about the ground leveling stage.  At any rate, I actually completed this project around two weeks ago but the photos sat in my camera FOREVER.  I swear, next to rain barrels, cameras are the laziest contraptions out there.  They just refuse to download photos themselves.

Before I begin, here's a photo of the completed system, just to give you a reference point for the more detailed photos:

Mainfold rain barrel system
As I mentioned in the former post, drilling a hole in the center of the bottom of each barrel was the first order of business.  For 3/4" PVC, a 3/4" drill bit was not quite enough, so Byron bought a 7/8" bit.  Even with that, I had to do quite a bit of filing to get the threaded end through the hole.  In one of the video links I provided in my previous post, it was mentioned that a 15/16" bit might work, and I think that would have been perfect.  The next task was to get the threaded piece into the barrel:

I attached a long piece of PVC to the threaded piece and...

...twisted it into the hole through the inside of the barrel.  It was a little tricky, but it worked.  I pulled the long piece of PVC out before turning the barrel upside down again.

Here the threaded piece of PVC sticks through the hole in the bottom of the barrel.  Although I used a rubber O-ring on the threaded piece, I was sceptical that it would be water tight.  So I screwed the coupling piece you see sitting next to it onto the threaded piece, turned the barrel right-side up, and put a bit of water into it.  Sure enough, leaking ensued.

Another issue: All barrels are not created equal!  This one had a thick, wavy seam on the bottom that I had to attack with an exacto knife.  It was a no-brainer that this one would leak, too.

I asked around, knowing I needed some sort of plumbing material that would withstand weather and be flexible.  Plumbers putty worked, but it doesn't really dry so I was afraid it would fall off under the weight of a filled barrel.  My Dad recommended something called RTV, which is a silicone-based liquid gasket.  I couldn't find it anywhere, but he found some at an automotive store.  It's really easy to work with and is similar in properties to silicone caulk.  After a bit of tweaking, it worked like a charm!  I used it for all the threaded pieces.  Thanks, Dad!
Here's the coupling piece over the threaded piece.  Is this making sense???


Because all barrels are not created equal, I measured how high above the bottom of the each barrel each coupling piece would protrude. It was easy: just a straight edge, a ruler, and sticky notes.

I then used a hacksaw to cut a small piece of 3/4" PVC to attach to the coupling piece. Filing off the burrs is important, too. 


To attach non-threaded piece, I used PVC cement (actually, I accidentally bought CPVC cement, but it does the same thing).  PVC cement is one of those fun adhesives that come with warnings like, "Touch this and you will die.  Eat this and you will die.  Give the adhesive a dirty look and you will die."  So I wore latex gloves and I'm still here.  Anyway, PVC cement basically melts the PVC.


Getting ready to attach the elbow...


...and the bottom of the barrel is plumbed and ready to be joined to the others!
 To be continued!

Monday, June 13, 2011

Our New Peeps: Green Acres Weekend Update

Sometimes we procrastinate because we want to.  At other times, because we have to.  We knew our new peeps (chicks) would be arriving this week, but amidst other projects we kept pushing the brooder/hen house aside.  So when we got an e-mail from the hatchery on Sunday, we dropped all other projects to prepare for our new arrivals.  Here's the play-by-play:

Sunday, June 12, 5:05 a.m.: E-mail sent from the hatchery to Byron, announcing that 73 chicks are coming SOON (like, tomorrow) to a post office near us.

Sunday, June 12, 10:00 a.m. - 9:00 p.m.: The nose-blowing and drilling commence.  Amidst a bad cold, Byron starts building a hen house/brooder for the chicks.  He gets the framing done and maybe one panel of the roof (thanks to our friend, Don, for the metal roofing)!

Sunday, June 12, 9:00 p.m.: Byron crashes and I start ripping apart cardboard to construct The Ultimate Indoor Jimmy-Rigged Brooder.  I also make sure the heat lamp works.

Monday, June 13, 6:00 a.m.: Byron's cell phone rings.  It's the post office asking us to rescue them from 73 annoying, peeping chicks.  Kidding, but not about who called.  Who knew the mailman got to work that early??

Monday, June 13, 8:35 a.m.: The kids and I pick up our new peeps.  Said peeps peck at me with their diminutive beaks from the holes in the box.  The kids can't get enough of that kind of naughtiness.

Monday, June 13, 8:45 a.m.: We get the chicks home, exile the cat from the house, and open the box.  Yup, everyone is alive.  The kids watch as I put the box of chicks under the heat lamp and take them out, one by one, to dip their beaks in water so they can get a drink.  The chicks then took it upon themselves to traipse about in the waterer and run up and down my legs.

Monday, June 13, sometime in the afternoon: Byron resumes work on the brooder/hen house. 

Monday, June 13, 6:00 p.m.: Neighbors visit the chicks.

Monday, June 13, 7:00 p.m.: Byron and Charlie go to collect river sand, which the chicks need for grit.  You can buy it at the store, but Joel Salatin says the real deal is better (and free).  And when it comes to all things chicken, he's the man.

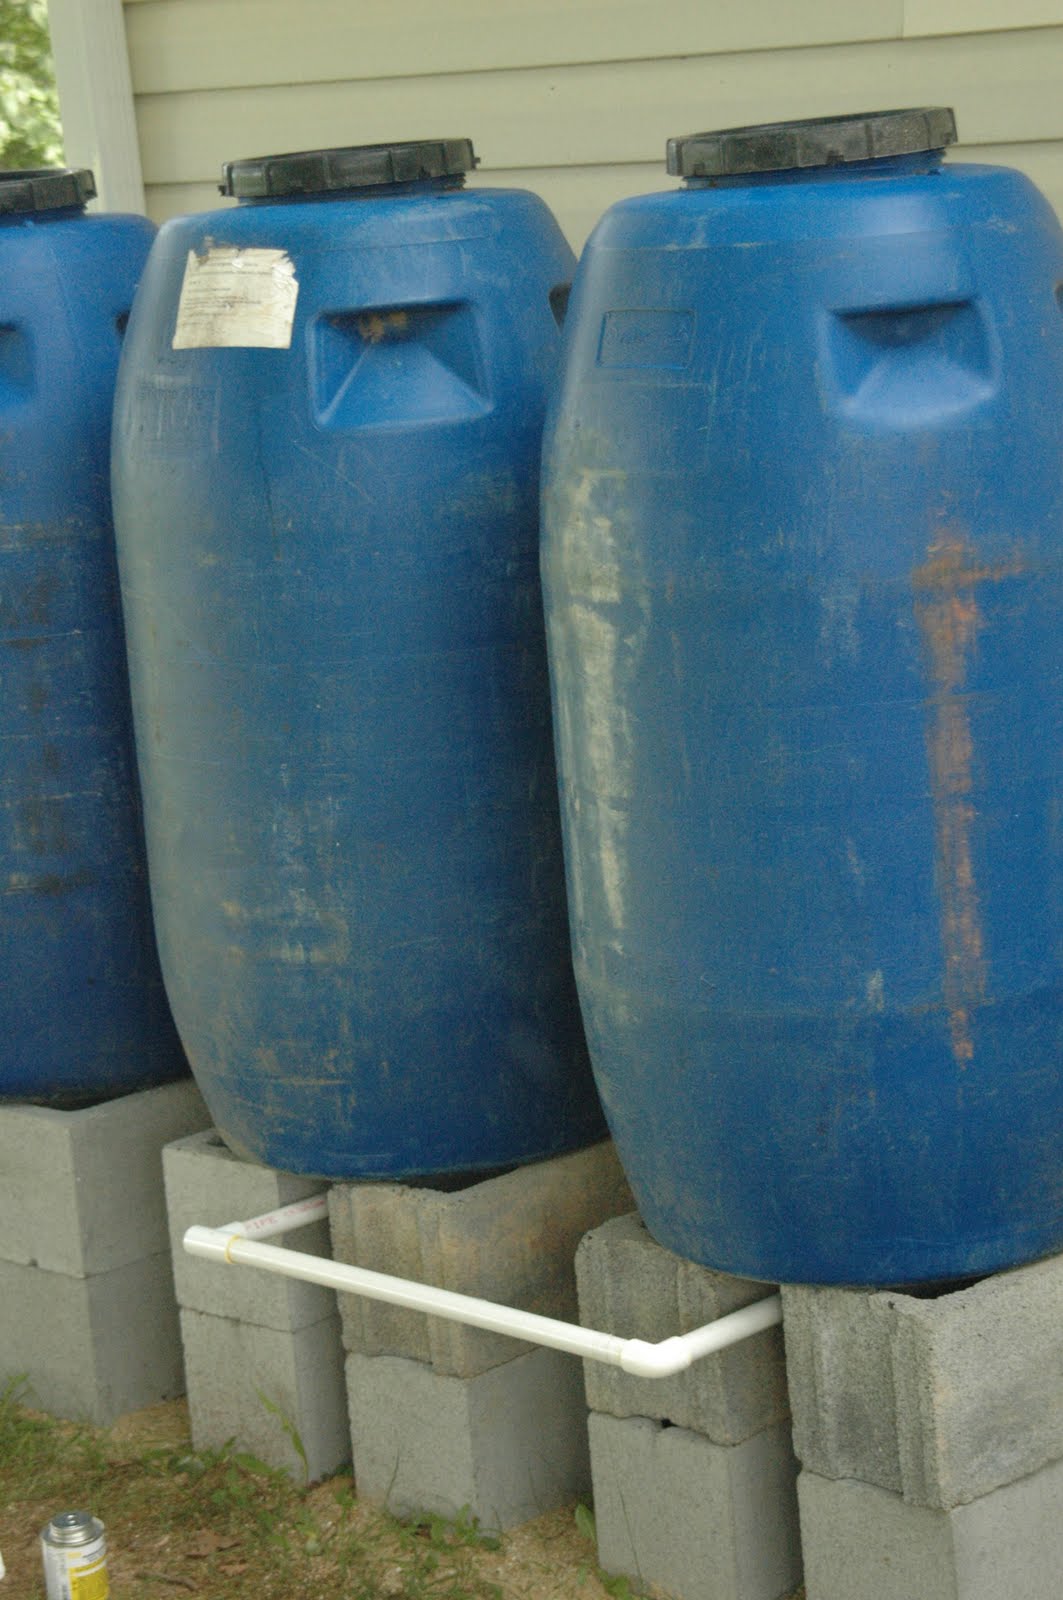
Monday, June 13, 8:00 p.m.: I begin writing a blog post on the rain barrels.  Seriously.  It's there; I just need to add a couple more photos, spell check (because I'm a horrible speller/typist), and hit "publish." 

Monday, June 13, 11:24 p.m.: That would be now.  I decided I couldn't pass up blogging on our new arrivals.  These two-day-old chicks have mesmerized us all day with their chirping and antics, and it's been a fun experience for the kids. 


Cornish Cross...our 50 broilers.  I know, I've heard horror stories.  But we're going to try our hand at them and see how they do in a mobile coop.  Hopefully that will keep them from blimping out too much.

A Rhode Island Red sneaks into the photo.  We ordered 20 of these hens and one rooster, but they threw in an extra rooster for good measure.  Or maybe they thought we'd enjoy a good cock fight.

The little black chick with the yellow spot is Mystery Chicken.  Anyone know what kind of breed this is?  He/she/it is smaller than the others and seemed to be the runt at first.  But tonight it developed short man's (or woman's) complex and started pecking the other chicks.  If it's a boy, we're calling him Napoleon.

Chicks in the indoor brooder.  They'll be here for a couple days while Byron finishes the outdoor structure.  Here they're under the lamp, but we think they got a little too warm in the middle of the day because they were congregating near the walls.  I moved the lamp up an inch, and that seemed to help.

Am I telling this backward?  Here's the box they came in.

The Ultimate Indoor Jimmy-Rigged Brooder.  Notice the rounded corners; apparently 90 degree corners are a no-no because the chicks will swarm there and suffocate each other.  They're not the sharpest knives in the drawer.

Outdoor brooder/hen house.

Hopefully these will hold lots of eggs in the years to come!

Non-operable, chicken wire transoms around the top perimeter...for our high-class birds.
I hope to share with you what we learn as we raise our first batch of chicks.  And remember to click below and visit some other blogs on Homestead Revival's Barn Hop!

Wednesday, June 8, 2011

What I Should Have Said

I promise, I was going to post on the rain barrels today.  But I'm interrupting myself because what happened yesterday evening is just too absurd to pass up, and to add a little suspense and expectation to Blogland (regarding the rain barrels).

As I was making calzones last night, someone knocked at the door.  I opened it to be greeted by a young man who was trying to get rid of a bunch of meat in his van, which struck me as odd but I listened to his spiel anyway.  And he occasionally interjected with lines such as:

Meat Boy: What's that?  Over there...on the door?

Me: A spider.

Meat Boy: A spider?  Oh, yuck!  I don't do the country!

(More about the meat, then...)

Meat Boy (finally noticing the dough on my hands): Was I interrupting something?

Me: I was making calzones.

Meat Boy: Making calzones?

Me: Yeah, I make them from scratch.

Meat Boy: GET OUT!

(Trying to get me to come out to the van to see this mystery meat, but I'm not budging and am beginning to wonder where Byron is, then...)

Meat Boy: (pointing) What are those over there?

Me: Cows.

Meat Boy: Cows? Are they pets?

Me: No, we're raising them for meat.

Meat Boy: GET OUT!

Oh, I how wished he would get out (he eventually did after I told him I wasn't interested).  And then I began to wish I was quick on my feet.  I'm one of those people who kicks herself for days because I think of a witty response after the fact.  However, I posted this incident on Facebook and am now inspired for the next clueless visitor who comes along.  Here are some suggestions from friends, as well as some of my after-the-fact thoughts, as to the alternate identity of our cows:

1. Big dogs
2. Big dogs we're going to eat.
3. Spotted African Pygmy Elephants
4. Ligers
5. Baby dragons whose eggs we found in the chicken's nest box and who have not sprouted wings yet.
6. Bos taurus (that's the scientific name...to which it would be great fun to preface with, "flesh-eating")

Or maybe I should just carry around a shotgun and some chewing tobacco and practice my, "You ain't from around these parts, are you?" line.  I'm open to suggestions.

Monday, June 6, 2011

Hay Harvest Spring 2011: Green Acres Weekend Update

Last week may be a bit of a blur between the homeschooling seminar I had to attend for three days and the energy-sapping heat that made my spinach bolt early, but I do remember seeing hay.  Lots of it.  We've begun to stockpile bales since we'll have to feed two cows this winter.

The tricky part about acquiring hay these days is cost.  The equipment is light years out of our budget, and the going rate of $7 per bale is pretty steep for us, too.  So what is a wanna-be farmer to do?

One idea is to trade labor for hay by getting to know people in the area who cut hay.  For us, this was easy because Byron grew up around here and Melvin and Mr. Woodward are farmers who have been cutting hay on his family's property for years.  Every day after work this week, Byron would brave the ungodly temperatures and help Melvin by catching bales, stacking hay, hauling hay...in the process getting mauled by ticks.  We got 85 bales for his work.

Another thought is to let some of your grass grow for hay if you have the acreage, and pay someone to cut it for you.  We have 5 1/2 acres and let a little more than half of that grow.  Melvin has cut and baled most of it for us, and we have 75 bales so far!  I was astounded we got that many, and we agreed to pay Melvin about $2/bale.  Since hay will last a couple years, we'll have some extra just in case.

The first hay harvest was in exchange for labor.

You know it's hot when you have to rush your camera inside because the lens is fogging up!

Did you know hay can spontaneously combust?? Byron "stickered" the bales in an attempt to avoid this undesirable phenomenon.  So far, so good.

Melvin cut hay on our property (above), and a day or so later he raked it.

Raked hay.

Not sure of the official name, but this machine makes hay bales.

And this "machine" carries them...

...and stacks them.  With the help of farm muscles, of course.
I also managed to finish my first manifold rain barrel system!  I'll post on that soon!

Check out some other great blogs at Homestead Revival's Barn Hop!

Thursday, June 2, 2011

To Medicate or Not to Medicate?

That is the question...or not.  When we first got the baby calves, we had some non-medicated milk replacer on hand.  I had gone to two farm stores to find some; the cashier at the first strongly advised me to buy medicated, and the cashier at the second had a couple bags in stock that someone had ordered and never picked up.  "People always buy the medicated," she told me.  I bought the non-medicated.

Now, I don't have an agriculture or animal science degree.  In fact, we realize we have a steep learning curve with any of our farming endeavors.  However, on this issue in particular, I've been wondering why the farming community at large purchases medicated everything.  Especially since calves on milk replacer are susceptible to scours (diarrhea) and can thus dehydrate.  Last time my kids were on antibiotics (it's been a couple years at least), they got diarrhea, too, since the antibiotics destroy the bad and the good bacteria in your body.  Wouldn't the medicated milk replacer essentially be doing the same in the calves' bodies?

Don't get me wrong; antibiotics have saved lives and continue to do so.  But are there other ways to be preventive of disease in both animals and people?  We're moving the calves to fresh pasture every two days at the most, they're eating grass now (apparently another industry no-no), we're not feeding them grain supplements, and they're growing.  But if they were still with their moms, wouldn't they be out in the field doing exactly the same thing?  Grain-based cattle farming seems to perpetuate a viscous cycle: feed cows grain, they get sick because they have difficulty digesting it, medicate, repeat.  The only benefit seems to be that the cattle get fatter much more quickly.

I may stand corrected if the calves drop dead tomorrow or next week or next month...like I said, we have a bit of a learning curve.  But we're trying our best to educate ourselves, whether it be from "grass farmers" such as the folks at Polyface, or the wonderful farmers we know around here who think we're a bit nuts.

Apologies for the brevity of this post!  I have a homeschooling seminar three days this week and the general busyness of life is piling up that sinkfull of dishes that I won't get to until at least 10 p.m. tonight.  Thanks for bearing with me...lots of updates to come!