Friday, October 29, 2010

'Tis the Season for Apple Butter

I love apple butter...on pancakes, on toast, on muffins, and straight from the jar.  I've gotten some as gifts before in those cute, decorative mason jars that you see all over the place at country stores but never buy because they're just too darn expensive.  At least I never do, because I always think it's something I'll make myself someday...and sometimes, I actually do.  Here's an easy apple butter recipe for your crock pot that will make your house smell unbelievable.  Neighbors will get a whiff from miles away and come flocking to your door.  Since you'll want to keep this delicious apple butter either for yourself or to give away as Christmas gifts, smile sweetly and hand off this recipe to them.  Then lock your door.

Crock Pot Apple Butter
Based on the recipe from the PickYourOwn website
Ingredients
6 quarts applesauce (homemade is best)
2 - 2 1/2 cups sugar
1 1/2 tbsp cinnamon
1/2 tsp allspice
1/2 tsp cloves

Equipment
pint canning jars
crock pot (the quantities in this recipe are for a 4-quart crock)
boiling water canner and instructions

Directions
1.  Make applesauce!  This is the easy step.  Slice and cook down the apples (minus the cores) in some water, then either press through a food mill or puree in a blender (I go for option #2).  Leave the skins on.  See?  That's pretty easy.  Approximately 44 medium apples will make six quarts.  And use sweet apples...no Granny Smiths!  Save those for pie.

I used a combination of Stayman (above) and Enterprise.
2.  Pour 3 1/2- 4 quarts of applesauce in your crock pot, along with the spices and 1 1/2 cups sugar.  Set it on medium heat if your crock pot allows.  My pot only has high and low settings; I've tried both and the high works best for me.  How long you let it cook will depend on the power of your crock pot, how thick you like it, and if you stir it occasionally.  I do this first step overnight. 

3. Prop the lid up with two knives and let it cook for 6-12 hours.

Put the lid over the knives...this method allows some steam to escape.
4.  When the applebutter has cooked down to about half its original quantity, add two more quarts of applesauce and the rest of the sugar (or add sugar to taste).  Set on high and let the flavors combine for a couple hours, stirring occasionally.  I leave the lid off for this step; you may want to use a spatter guard if your crock pot tends to get really hot.  The finished applebutter shouldn't be too runny; you should be able to scoop some onto a spoon without it dripping everywhere.  If you let it get too thick, add a bit of apple juice and blend it in.

Apple butter ready to be canned.
5.  The next step is to can the applebutter; this recipe yields about 7 1/2 pints...so I process seven pints and put the extra bit in the fridge to enjoy right away.  If your apple butter isn't boiling, you'll want to bring it to a boil by placing it in a pot on the stove and carefully boiling it before you place it into your sterilized jars. 

6. Process pints of apple butter for 10 minutes using the boiling water method.  Be sure to adjust time for jar size and altitude, according to your canner manufacturer's instructions.

7.  Never canned before?  Click here for my post on canning.  It references the PickYourOwn website's canning instructions, which are thorough and well illustrated.

8.  Consume apple butter.  If you can spare some, it makes convenient, delicious, and inexpensive holiday gifts!

Wednesday, October 27, 2010

Nine Lives? Let's Hope

About a month ago, a little cat showed up on our front porch.  She's since adopted us.  We didn't want a cat, but we couldn't resist...we even shelled out money to get her spayed and get shots.  She's seriously one of the sweetest little creatures I've ever encountered.

Which begged the question, "Why would someone get rid of her?"  Byron and I guessed she had been dumped off on our street, since she was obviously used to being around humans.  Well, last week we found out why someone may not have wanted her.

Friskies had a seizure.

It began right after we'd put the kids to bed.  We were keeping her in the house for a few days after her surgery, so she had, in typical Friskies fashion, followed us upstairs.  Byron called her to come downstairs, and she started to scurry toward the stairs, which was strange.  She may be sweet, but she's still a cat and cats don't usually come when you call unless bribed with food.  She then stopped by our door and began convulsing.  I called Byron in a panic.

Our combined thoughts were the she was either choking or having a seizure (Byron actually had a student a few years ago who had a seizure in class).  In any case, after we got her out onto the front porch, we both tried sticking a finger in her mouth; we found out a couple bandaids later that cats don't swallow their tongues during seizures.  But as she sat afterwards, her breathing shallow and her eyes glazed, we were convinced she was either going to die or be brain damaged.  In either case, I really wasn't ready to have that "Do cats go to heaven?" discussion  with Akea.  Seriously.  She had spent at least half an hour that afternoon drilling me on the eternity of God and the Trinity, and my brain still hurt.  Besides, I had become rather fond of Friskies and I wasn't ready to say goodbye to her either.

We were literally overjoyed to see her back to her normal self the next morning.  When we had gone to bed the night before, she had been almost catatonic and very unresponsive.  Apparently cats can be in this state for anywhere from one to twenty-four hours after a seizure.  She slept most of the next day, I and made some phone calls and did some research on possible causes.

Some cats are born with this condition, and others get it from environmental causes, such as head trauma or eating something they shouldn't.  It's relatively rare in cats as compared to dogs, and vets recommend a series of blood tests to determine the cause...and sometimes, even after dozens of tests and hundreds of dollars, the cause remains elusive.  It's also possible that cats can get seizures as a result of the rabies vaccine, so I called the clinic.  They said she would have reacted within an hour of the vaccine, so that was a no-go.

Possible remedies to seizures are a variety of medications that have ill side effects on vital organs, such as the liver.  That seems rather counter-productive to me.  The solution that Byron and I came up with is to keep her inside at night, so if she does have a seizure in the wee hours, she at least won't be prey to foxes, opossums, and the spattering of other potential predators that may roam the woods behind our house.  I grudgingly bought a littler box and pooper scooper.  We had a talk with the kids and told them we were going to be thankful for whatever time we had with Friskies. 

But cats have nine lives, right?  Here's to hoping that the nine lives myth is true!

Girl's best friend!

Monday, October 25, 2010

Whole Wheat Baking Basics...Part III

Here's the final post on the basics of baking whole wheat bread.  There are lots of pictures, and I'm sure more posts will be generated from this one.  Ask me questions, if you have them.  Maybe, just maybe, I'll have an answer!  Anyway... (I know, I say that a lot.  I need a writing teacher here to rapp my knuckles with a ruler).  Anyway (ouch!), here goes:

1.  You've let your bread rise twice.  After that second rising, punch it down again and then turn it out onto a floured surface.  Flatten it to expel all the air, and divide it in half with a knife (we're assuming a two-loaf recipe here).  Then, shape each half into a round, cover, and let the dough rest for ten minutes.  This will make the dough easier to work with.  Kind of like when your kids take a nap (I remember those days).

Flattened and ready to be divided.  It's just dough...not medieval torture.

You can re-shape the halves into circles, if that helps.  Fold over the top toward the center.

Fold the left corner in toward the center.

Fold the left side in toward the center.

You guessed it...fold the bottom in toward the center.

Fold that little leftover corner on the right in toward the center.

Flip the round over and shape it a bit with your hands.

Place back on a floured surface and cover.  Let rest for ten minutes.
2. When your dough is done resting, it's time to shape it into loaves!  I usually grease my bread pans with a bit of butter during those ten minutes.  By the way, you should use 8x4 bread pans when baking traditional, sandwich-style loaves with whole wheat flour.  The typical 9x5 pans will give you a squatty loaf; remember, whole wheat flour doesn't have all those additives to make it puff up like a mushroom after a rainstorm.  You can buy 8x4 loaf pans at your local big box store. 

Of course there are many, many ways to shape loaves, but let's start with the basics.  You can shape your loaf into a hearth-style round using the method I showed you above.  Or for a traditional loaf, try this:

When your dough is done resting, flatten your round to expel the air again.  Do this if you're making a hearth-style loaf as well.


Fold the top edge toward you, almost in half.  Press down.

Fold the left and right edges in toward the center, pressing down.

Roll the dough tightly toward you.


Pinch the seam together.

Place dough, seam side down, into a greased loaf pan.
3. Now your loaves are ready to proof, which is a fancy way of saying final rise.  Cover them with plastic and a towel and put them back in the oven with the light on.  Or, if you have a slightly warmer location, place them there.  Ideally, the final proof should be done at a slightly warmer temperature than the other two rises.  Also, the proof takes about as much time as the second rise.  So if your second rise took 40 minutes, your proof should take 40 minutes.  Keep this in mind when preheating the oven.  My oven takes about six minutes to heat up, so when I have about six minutes of proof time left, I take the loaves out, cover them with another towel (you don't want them to catch a draft now - they could fall during baking), shut the light off in the oven, and preheat to the temperature specified in the recipe.  You can tell when it's done proofing by moistening your finger and pressing gently into the loaf.  It's ready when it feels spongy and the indentation fills slowly.  If the indentation remains, it's proofed for too long and may not rise as well during baking.  Bake it anyway, but keep in mind that it's better to bake a loaf that's proofed slightly under than over.

4.  I don't always do this, but you can decorate your loaf with sesame seeds, poppy seeds, or flax meal (my favorite).  Even if you skip this step, you can make an incision in the loafs before popping them into the oven to give them a little flair and a little help rising during baking.

I grind flax meal in my old coffee grinder.

Brush the loaf with room-temperature milk.


Sprinkle with flax meal.

Slice a bit into the tops of the loaves with a sharp knife.  Hearth-style loaves (left) can have three parallel-ish incisions, as shown, or a cross.  Traditional loaves (right) can have one long incision or three diagonal.  The choice is yours.
5. Bake!  After removing the loaves from the oven, wait ten minutes or so before gently sliding a knife along the edges of the traditional loaf, or a spatula under the hearth-style loaf.  Carefully tip the pan(s) over or remove the hearth loaf from the sheet.  If you can wait half an hour or so to cut, you have more willpower than I...and not such a squishy loaf.  Lather with your favorite spread and enjoy.  There's nothing better than freshly baked bread!


Traditional loaf.

Hearth-style loaf.
For Part I, click here.
For Part II, click here.

Sunday, October 24, 2010

Whole Wheat Baking Basics...Part II

Looking back at my baking posts, I saw that it has been over a month since I last wrote about bread making, and all I did was touch on ingredients.  Honestly, I meant to post much earlier than this, but for one I kept forgetting to take photos while I was baking, since flour + water + Nikon D70 don't mix.  Then finally, I remembered to take photos.  Then I forgot to write the post, probably because I was busy dusting flour off my camera.  You see, it all becomes a vicious cycle.

Anyway, I'm not even sure if anyone out there has been waiting for the sequel, but if so, here it is.

In Part I, I talked about ingredients.  Here I'll address the first part of the actual baking process, step by step.  These are probably applicable to almost any basic whole wheat bread recipe, but I will try and post some of my favorites in the coming weeks, including the pizza dough recipe we use every. single. Friday.

1.  Once my ingredients are assembled, the first thing I do is mix the yeast with about half a cup of the water measure in a small bowl.  Remember, yeast can only react with water that is 105-115 degrees, and so using a thermometer during this step can prevent a lot of heartache later on.  Mix until the yeast has dissolved, then set aside.

2. Combine your other liquid ingredients, such as water, oil, and honey, and take care that these aren't too hot or cold, either. For instance, the yogurt bread recipe I'm into right now calls for water to be mixed in with almost a cup of yogurt, which is obviously cold. In that case, I make sure the water is sort of hot so that the mixed temperature of the dough will be warm.  When this is done, add in the yeast mixture and combine all the liquids.

3.  Now add your dry ingredients, namely flour and salt.  Some recipes call for you to sift these together, but I'm a big baking cheat and never do that sort of thing; I just kind of stir everything around a couple times before combining it with the liquid.  When you combine the dry and liquid ingredients, make sure you mix everything well so that it's homogeneous - this isn't a lumpy pancake batter!
Flour and salt ready to be mixed with the liquids.

4. Kneading time! Okay, don't flip...twenty minutes, by hand, for a two-loaf recipe. I used to do this, and I totally recommend starting out that way the first few times! If you have a mixer, half the time. Here's a chart of sorts to make that easier:
  • Standard two-loaf recipe (5-6 cups flour): Knead 20 minutes by hand, 10 by machine
  • Doubled, four-loaf recipe: Knead 40 minutes by hand, 20 by machine
  • Half, one-loaf recipe (sounds silly, but practical for a pizza crust): Knead 10 minutes by hand, 5 by machine
Make sense? Think 10 minutes by hand per loaf.  If you're using a mixer, it's a good idea to check the dough periodically, because it could take a minute more or a minute less, depending on the gluten quality of your flour (all this means is that some wheat berries naturally have a stronger gluten content than others, but all hard wheat should work in the end). The fully kneaded dough should be able to be easily formed into a roundish ball.  If you're using a mixer with a dough hook, much of the dough will have formed a ball around the hook.  And I should mention that if your recipe calls for butter instead of oil, add the butter, cut into small chunks, a couple minutes before kneading time is up.

I need to scrape the bowl once or twice during kneading.

The fully kneaded dough forms around the bread hook.
A quick word about mixers: I have a Kitchenaid Pro, which can handle about 9 cups of whole wheat flour without swallowing my dough, chewing it up, and spitting it back up at me before bursting into flames.  It works for our family of four, and before I got the Kitchenaid I just used the mix cycle in my bread machine.  If you have a larger family, you may want to consider getting an Electrolux or Bosch mixer.  They are the Cadillacs of mixers (and unfortunately priced as such) but can handle larger quantities of whole wheat flour.  And like Kitchenaids, you can purchase various attachments for them. 

5. Rising time: Place the dough in a clean bowl, or if you hate washing dishes as much as I do, leave it in the mixing bowl and cover it with plastic wrap and a towel, and place it in the oven with the light on (not with the oven on!). In the winter, I like to place mine in front of the woodstove.  Rising time will really depend on how much yeast you use and how warm the dough is kept (keep in mind that more yeast = poorer keeping quality).  As a gauge, I use about two teaspoons of yeast for a recipe that calls for six cups of flour, and depending on how warm I keep the dough, it can take an hour to an hour and twenty minutes to rise.  As for rising temperature, somewhere in the neighborhood of eighty degrees is probably good.  To tell when the dough has risen enough, it should about double its size.  Or, a nice trick is to wet your finger and poke it 1/2" into the dough. If the dough closes back in, let it rise a little longer. If the dough sinks a bit, it's risen too long. If the hole just sits there and looks at you, it's perfect. Punch it down and let it rise again.

Bread rising in the oven, with the light on only.
I admit...I poke two or three or seven holes in the dough to see if it's done.
6. Again??!! Yes! Though you can get away with letting whole wheat bread rise only once before shaping it, remember it doesn't have all those additives white flour has to strengthen the gluten. Let it rise again, and the good news is that the second rising should take half as much time.

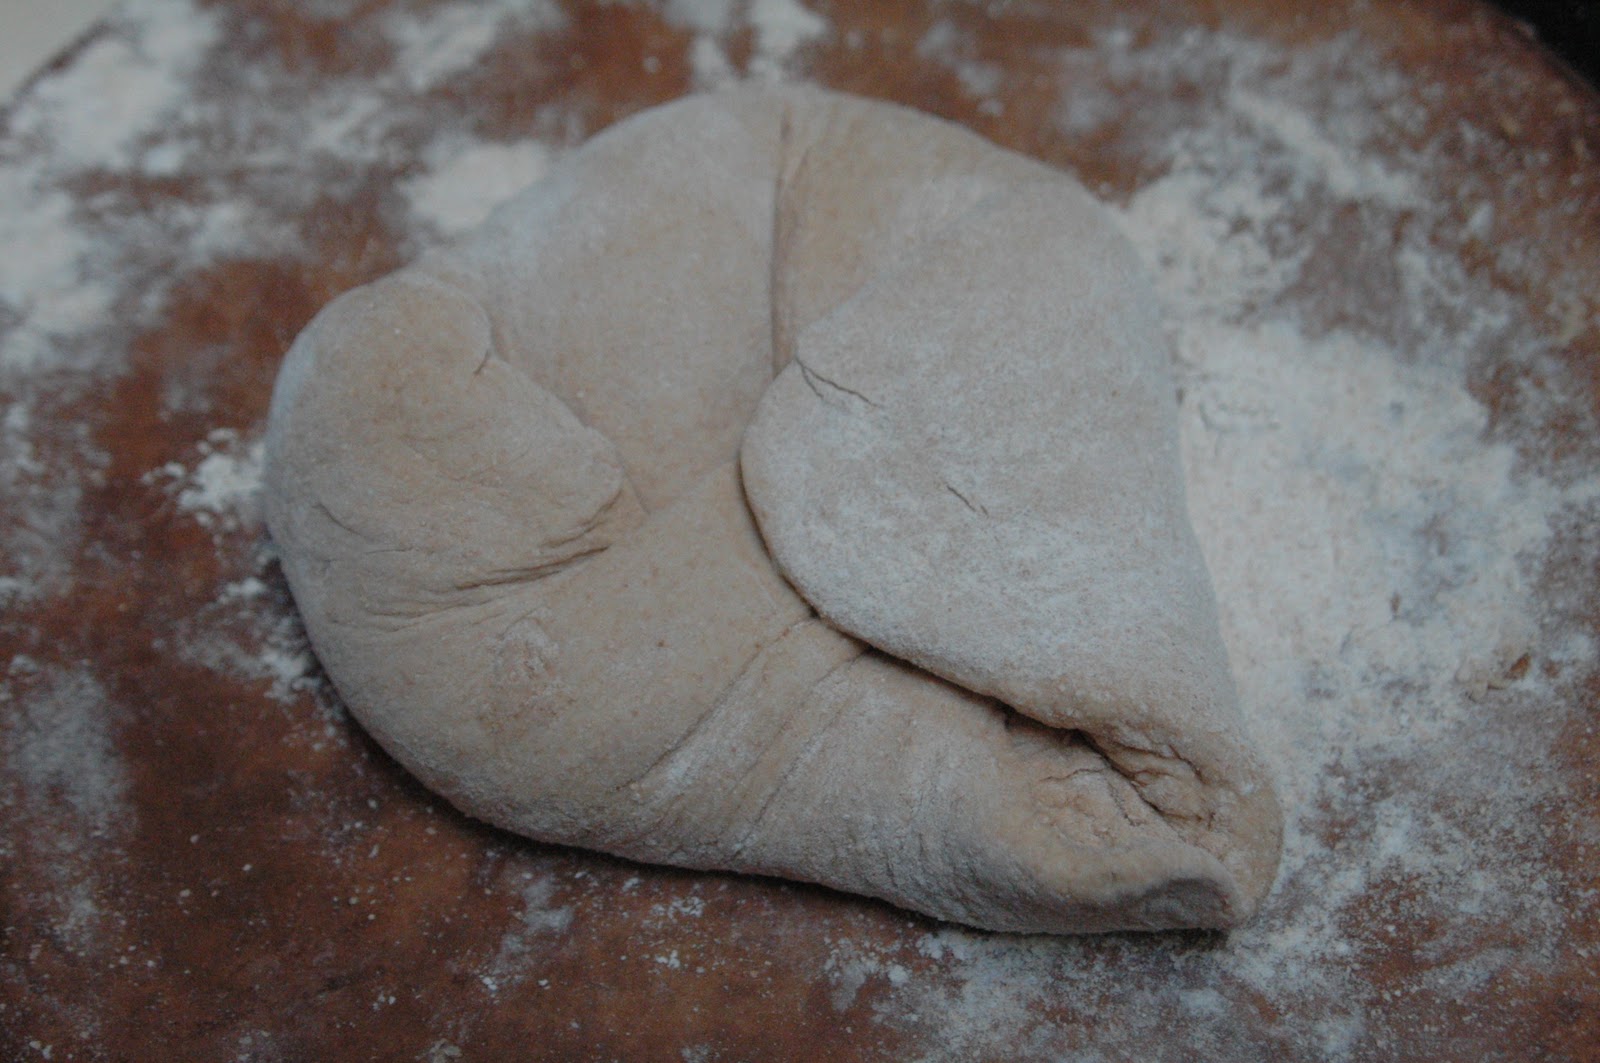
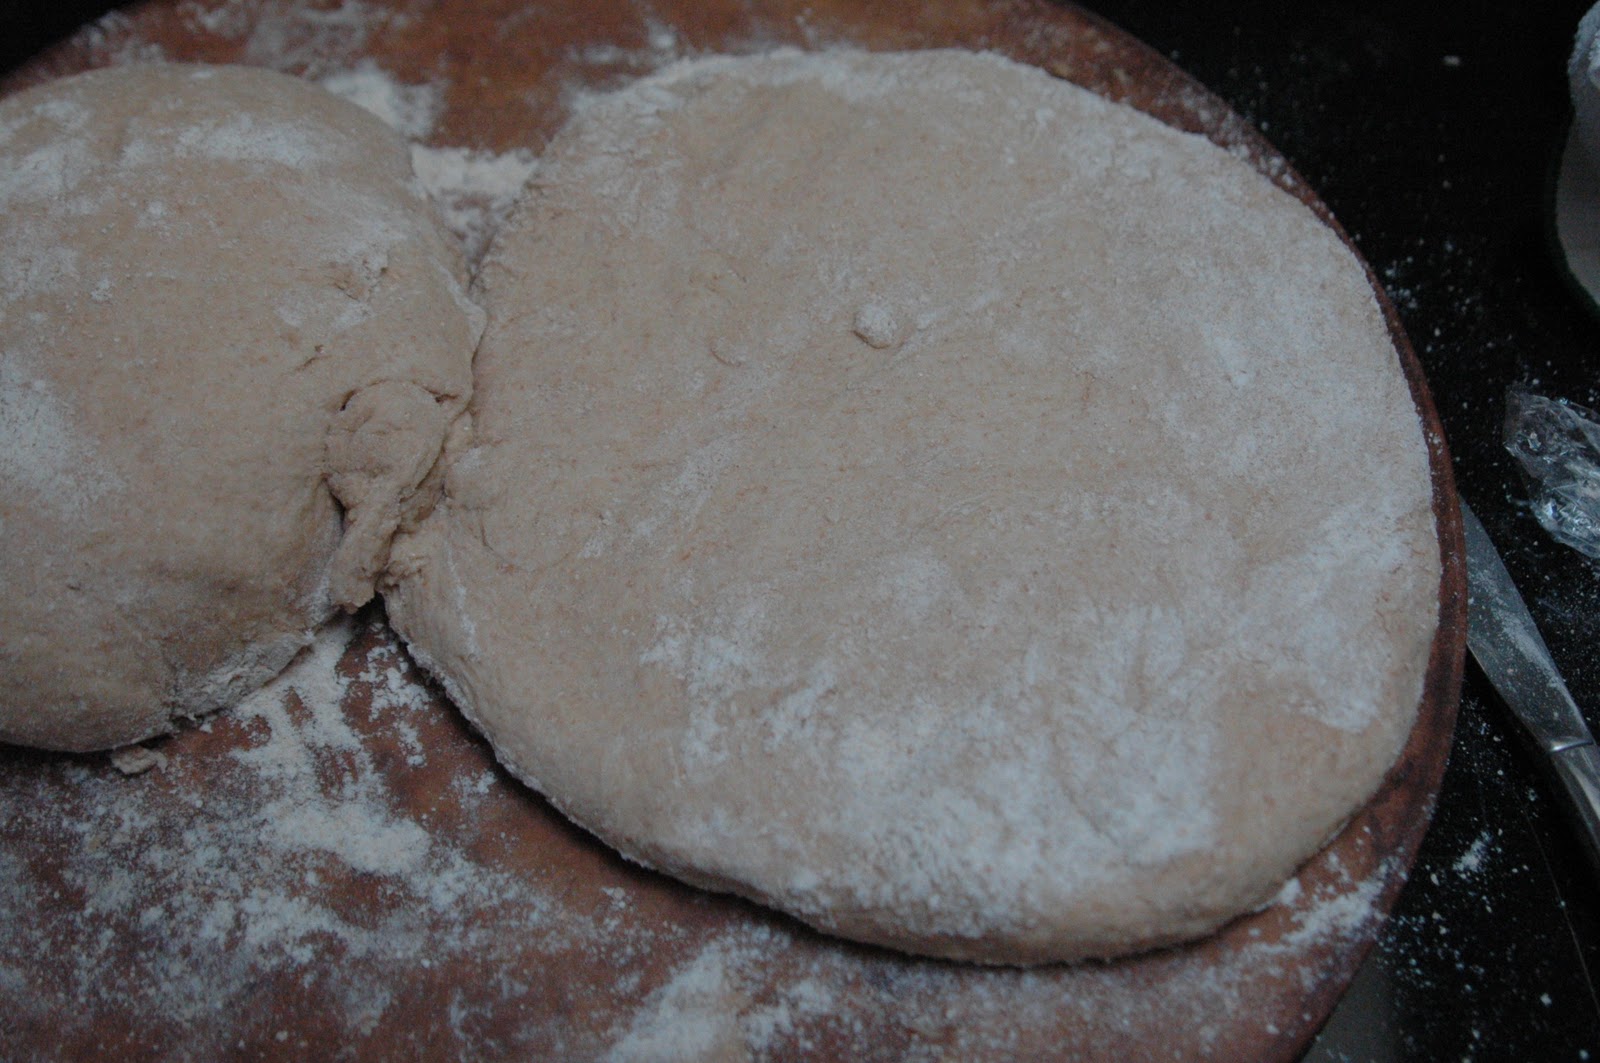
Dough punched down...and you can see strands of gluten on the left.  See? It was worth the second rise!
Now the dough needs to rest for 10 minutes before you shape it for the final rise, which is called the final proof.  Since I took lots of step-by-step photos of dough shaping, I'm going to write another post about that.  Soon.  But probably not before the dough pictured above is done with its second rise.

Saturday, October 23, 2010

The Maiden Voyage of the Woodstove

I wrote an earlier post about the hearthpad that Byron built for our Woodstock Fireview soapstone woodstove (click here to check it out).  We finally had it installed - incidentally, on our 10th wedding anniversary.  Our home has electric heat, but we're planning on heating primarily with wood so we won't go catatonic every time we open an electric bill this winter and because it's another way many people add a little sustainability to their lives, whether they know it or not!  (Did you know burning wood in a modern woodstove releases just as much carbon dioxide into the atmosphere as a tree rotting naturally?  All of the wood we currently have stockpiled was given to us from trees that were cut down or pruned from small city lots.)  Besides that, however, wood heat has this amazing ability to penetrate you to the core.  There's really nothing like it.  We installed a Hearthstone Homestead soapstone woodstove we bought off Craigslist in Other House a couple years ago, and it kept us quite toasty during the Snowpacolypse of '09-'10.  Byron and his cousin installed that stove with double-wall chimney pipe, which we bought at the hardware store, and Byron built the hearthpad with slate tile on top of layers of cement board.  Behind the stove, Byron installed reclaimed wormy chestnut panelling under the built-in bookshelves.  Ah, memories.  We haven't always been in the Ghetto Stage!

Our Hearthstone woodstove...hopefully whoever buys our house will appreciate it as much as we did!
We decided to go with a Woodstock stove this time because it's built a little differently than the Hearthstone.  Woodstocks have double-wall soapstone with an insulating airspace in between, which lets the heat emit slowly...spreading it more evenly over the entire house.  Our particular model has a catalytic combuster that actually burns the smoke from the wood, making it extremely efficient.  So if Byron continues to stockpile wood like he has been for the past few years - and have I mentioned he's a wood miser? - we should be good to go until we're well into our eighties or nineties.  Okay, maybe I'm exaggerating.  Anyway, Woodstock hand crafts all of its stoves in New Hampshire and ships customer-direct for a very reasonable fee...less than driving up there, for sure.  Click here to visit their website.  So after Byron picked the stove up, the trick was to get it into the house.  We had to call in some big guns for that:


See that little white tag on the crate?  It reads, "500 + lbs."  Yikes.

Thanks to whoever invented the dolly...
...and thanks to Fred (my brother, in the black shirt), Robb (with his back to the camera) and Shawn (on right.  Also known as Hercules.)
The farmhouse has two substantial chimneys (and three fireplaces) that were added on by Byron's Aunt Sue and Uncle Rodney in the 1980s.  However, you can't just smack a woodstove onto the hearth and stick a pipe up through the damper...unless you have a death wish.  When installing a woodstove, a chimney needs to be lined with a special stainless steel pipe, wrapped in ceramic wool insulation.  We thought about installing the chimney liner ourselves, but decided that was best left to people who actually know what they're doing, since we are talking fire here.  And if there's any way you can have this done in the summer, you'll probably get a better price.  I think the guy we hired has been pulling some serious hours lately, but we liked him and also liked that he actually cut out the damper in the fireplace; some installers want to leave the damper in and ovalize (i.e., squish) the pipe, and we weren't too keen on that idea.  Here's Byron and his woodstove the evening it was installed.  I got a full lesson on operating the thing, since this is going to be my job - one of them - when Byron is at work.  I've already requested a cheat sheet.  Byron loves the stove not only because it's one of the best quality and most efficient available - not to mention made in America by craftsmen and women who obviously take pride in what they do - but also because he somehow thinks Grandma and Grandaddy Green would appreciate this work of art sitting in their parlor and warming a home they loved.

The first fire!
Our heater...to be much enjoyed for many winters!

Tuesday, October 19, 2010

And Then the Cow(bell) Came Home

A couple weeks ago, Byron's Aunt Dottie sent me an e-mail wrought with mystery.  My in-laws had visited her and Uncle Hank on a cross-country trip, and apparently she had given them something for us.  Byron and I mused over this mystery, but this cowbell was nowhere near any of our guesses!

The thing that's so special about this cowbell - besides seriously being one of the coolest things I've ever seen - is the story behind it.  Back when she was a teenager, Aunt Dottie was a cheerleader at the local high school, and her grandfather, Charles Green, gave her this bell to use at football games.  You may recall that Charles Green was Byron's great-grandfather, and that this house was originally built by him.  We own 5 1/2 acres of the original farm, but back in the day it was a 51-acre dairy farm.  Byron's dad said that this was the bell that the lead cow would wear, and according to Byron's Aunt Sue, she and her siblings would "help" their grandparents drive the cows from place to place, though she admitted that they may not have been as much help as they thought!

Aunt Dottie wanted the cowbell that she'd kept all these years to come home again, and Byron and I are so honored that she passed it on to us!

Saturday, October 16, 2010

How to Plant a Tree...or Not

I mentioned in a recent post that we have four new fruit trees.  Well, bring that down to three.  In several easy steps, here's how to reduce your fruit tree population:
1. Get into pickup truck.
2. Start engine.
3. Shift into reverse.
4.  Back up.
5. Keep backing up.
6.  Back up a little more.
7. Shift into drive.
8. Drive several miles.
9. Get flagged down by passing motorist.
10. Stop truck.  Get out.
11. Observe fruit tree wedged under trailer hitch of truck.
12. Place call to owner of fruit tree and fess up to mishap.

But I won't fess up as to the guilty party!  Here's our Orient Pear tree now:

Thursday, October 14, 2010

Return to Blogland?

I've been thinking this whole week that I really haven't had much of a chance to update the blog recently.  I follow several blogs and am amazed at the wonderful posts these other busy moms manage to create.  Maybe I've been slacking because of our frequent trips to visit Other House.  Thankfully, fall is here and we won't have to keep the grass cut as often...and wouldn't it be nice if there was a contract waiting for us on our next trip down there?  Well, I can hope, right?

Another reason is that I managed to score almost an entire bushel of free apples from a small local orchard.  When the owner told me I could have anything on the ground for free, he obviously didn't know who he was talking to!  So...let the gleaning begin!  To be fair, I searched the almost barren trees for apples I could actually buy, but there were so many wonderful Enterprise apples on the ground that were barely damaged that I couldn't resist rescuing them from the plethora of yellow jackets feasting on their fermenting brothers.  I also bought half a bushel of lovely, dark, Arkansas Black apples.  With the Enterprise (sweet and Fugi-like, but much easier to grow because of their disease resistance), I made applesauce and mixed them with some Staymen for some apple butter.  Arkansas Black are rather tart, however, so I made an apple crisp with those.  They're not my favorite eating apple, but they store well and are one of Byron's favorites.  These trees are also quite disease resistant.

And then the other reason the blog's been suffering...homeschooling.  Obviously, this is one of my priorities, and I really haven't blogged about it yet because I'm not sure of how much wisdom I have to offer on the topic.  I will, however, have to start blogging about some of my trouble areas so that I can glean some wisdom from those of you who have more expertise than I in this area!

Along those lines, I will throw out there that I'm a tutor for our local chapter of Classical Conversations, which is a national organization that takes a Christian, classical approach to education.  I absolutely love this program!  Charlie isn't in a class yet, but Akea is in my class, a group of seven 5-6 year old girls (we nerd moms call this the Abecedarian/Apprentice class).  CC encourages the local chapters to divide the classes by gender (dividing by age is sort of a given) because girls and boys learn so differently.  And I can attest to this...I tutored the Abecedarian (4-5 year old) boys last year.  With the boys, we did a lot of marching, jumping, throwing (sometimes this got a little out of control, I admit) in order to learn the memory work for the week.  The girls, however, are content to clap, color, and chant their history sentences, science facts, and so forth.  It's a nice breather for me.

So preparing for CC takes up some time during the week.  This week, however, I have my work cut out for me because we're starting tin whistle, which is the scourge of almost every CC tutor who does not have a degree in music.  Not because it's impossible to teach, but because it's intimidating to those of us who can barely play "Chopsticks" on the piano.  And to boot, I can't sing.  Seriously...unlike many homeschoolers out there, we're not a VonTrapp family!  I dread it in church when someone is standing directly in front of me during worship.  Yeah, yeah, I know...make a joyful noise unto the Lord...I've heard that before, okay?  Anyway, CC meets tomorrow and though I have a lesson prepared, I need to actually make sure I can play more than one note on that darn instrument.  And the whole time, I'll be looking forward to the spring semester of CC, when we'll alternate back to visual arts and I can let my tin whistle collect dust for another year!

Well, that was longer than I anticipated, and I need to begin my day.  Here are some topics I anticipate blogging about in the coming weeks:

1. One of the coolest things I've ever seen...a gift from Aunt Dottie and Uncle Hank!
2. More on canning applesauce and apple butter
3. More on baking bread
4. The Wanna-be Farmers (that's us) must be crazy...a post on foraging hay
5. And maybe I'll let you know how tin whistle is going...

Thursday, October 7, 2010

Orange-Cranberry Bread...Adapted

You've found some autumn berries, right? Here's a recipe for orange-cranberry bread adapted from The Laurel's Kitchen Bread Book, right in time for the holidays. Except we ate some for breakfast today and I've substituted autumn berries for cranberries. The results were spectacular!


Orange-Autumn Berry Bread

Ingredients
3/4 cup autumn berries (yes, you can use cranberries instead!)
1 tbsp grated orange peel
1 1/4 cups orange juice
1/4 cup honey
1/4 cup butter or oil

2 cups whole wheat flour
2 1/2 tsp baking powder
1/2 tsp baking soda
1/2 tsp salt
1/2 cup wheat germ
1/2 cup lightly toasted, chopped walnuts

Preheat oven to 375 degrees. Grease an 8x4 loaf pan or a 12-cup muffin tin. In a saucepan, combine cranberries, orange peel, juice, and honey. Bring to a boil, stir in butter or oil, and remove from heat. Allow to cool to lukewarm while combining other ingredients.

Combine the flour, leavenings, salt, and wheat germ. Stir in cooled liquid ingredients and fold in walnuts, reserving 3 tablespoons for topping if desired.

Pour batter into loaf pan or muffin tins. Sprinkle nuts on top and press down lightly with your hand or the back of a spoon. Bake loaf for 50-60 minutes, muffins for 15 minutes. Test with a toothpick. Let the loaf/muffins rest on a wire rack for 10 minutes before turning out of pan, and the loaf for another 30 minutes before slicing. The bread will be less likely to crumble that way.

Notes: I had to wait longer then the time it takes to mix the dry ingredients for the liquids to cool. In addition, I didn't decorate the muffins with walnuts since we were just eating them for breakfast, but it seems like a nice touch of you're taking this to a holiday gathering. I've also collected and frozen some autumn berries so I can use them in this loaf later in the season. No need to de-pit them; the pit is chewy and barely noticeable. Keep in mind that they sweeten as the first frost date approaches! If they're still just too tart for you, try adding a bit more honey to this recipe if you're using them.

Wednesday, October 6, 2010

Homemade Yogurt

Ingredients
3 1/2 cups (or a bit more) whole milk (NOT ultra-pasteurized)
1/4 cup powdered milk (optional)
1/4 cup plain yogurt
fruit or honey

Directions
1. Heat the milk on medium-low heat, to 180 degrees. If you want to use the powdered milk for a thicker yogurt, stir it in during heating. Stir occasionally with a wire whisk to prevent burning. (I use quart canning jars to store the yogurt, and if you heat four cups, it will be too much to fit into the jar). DO NOT use ultra-pasteurized milk; it's been heated to too high a temperature and there's virtually nothing left in it to react with the yogurt culture.


2. Let the milk cool to 108-112 degrees. I place my pot of milk in a pan of cold water to speed the process. It doesn't take too long.


3. Mix in 1/4 cup of PLAIN yogurt that has active, live cultures. I buy a small container of yogurt to start, and you don't need fresh yogurt every time. Once you make a quart of yogurt, you can use some of that for your next batch, and so on down the line. You should be able to get about seven generations of yogurt before you need to buy some fresh starter again. I did find powdered yogurt culture called Yogourmet in a health food store, and that works well, too. Just follow the directions on the package; they're similar to those given here.

4. Pour into a yogurt maker and let it sit for 10-12 hours.


5. Place your yogurt in a jar and store in fridge Let it set for about 8 hours. Mix with honey or fruit and enjoy!

You Make Your Own WHAT??!! The Fun of Homemade Yogurt

I've had some people ask me lately about making yogurt at home, namely, Byron's Aunt Dottie and Uncle Hank. They were familiar with the idea but wanted some details, so I e-mailed them a recipe and promised myself I'd write a longer blog about it later. Well. That was about a week ago. Since making homemade yogurt is easy and inexpensive, I wanted to begin writing about it before it slipped into the black hole that is my brain.

I first got into making yogurt because I was paying a whopping $3-$4 dollars for a quart of organic stuff from the store. And we go through a lot of yogurt. Byron makes shakes every morning, and the kids and I have yogurt with our lunch. So I figured if I bought half a gallon of milk for $3 (I buy hormone/antibiotic-free stuff), I would essentially be paying $1.50 for a quart of yogurt, and I liked that idea a lot.

But before I began making my own, I had to make an initial big switch: flavored yogurt to plain. This, admittedly, was an acquired taste, but it didn't take long for any of us to become acclimated to its tangy flavor, especially when it's mixed with honey or fruit.

Reading the ingredients in flavored yogurt also helped ease the transition. Do you know how much sugar is dumped into the stuff? A lot. And sugar promotes the growth of yeast in your body. Not that I'm blaming flavored yogurt for the bulk of sugar consumption in America or even in our own family, but it seemed like a very easy thing to cut out of our diets. In addition, adding all that sugar to yogurt seemed almost counter-productive. Yogurt contains good bacteria and when eaten on a regular basis, can build up your internal immune system. And when partnered with freshly milled grains (read more about the health benefits here), the good bacteria will be able to propagate. So it seemed like putting more sugar into my body, which in turn would promote the growth of yeast, would be like forcing the good bacteria to fight a meaningless skirmish when it should be fighting possibly a greater war (such as a more serious sickness). Okay, I hope my logic makes sense.

Back to making yogurt. First, you might want to procure a yogurt maker, since the yogurt needs to incubate at a steady temperature for several hours. There are ways to make crock pot yogurt, and you can incubate it in your oven if the temperature is low enough, but those methods have never worked for me (if you have any secrets here, do share!). Yogurt makers can range greatly in price and design. Some come with handy little cups that you can put in the fridge and then grab on your way out the door. Some can hold a quart canning jar. Click here to see what Amazon has and read reviews. This is a small initial investment that will pay off in a couple months. Mine is a Donvier that my friend Kim passed on to me:

Next, the milk. If you have a source for raw milk, that makes amazing yogurt! But if you're like the rest of us you may not have that source or may have raw milk phobia. I'm working on that one myself...much of the fear and government animosity toward raw milk stemmed from the evil swill milk made in cities during the Industrial Revolution. Cows were fed distillery by-products and made to stand in their own feces (hmmm, sorta like the modern beef industry that said government subsidizes with your tax dollars) and then got sick. Well, duh. Their milk was then fed to babies and small children, and no one likes it when babies and small children start dying. But the fact is that raw milk from healthy, grass-fed cows sustained many people for generations prior.

The next best thing is milk that is NOT ULTRA-PASTEURIZED. Ultra-pasteurized milk, to me, is pointless to drink because virtually all the nutrients in to have been killed off...and all for the sake of shelf life. Hence, there's nothing in it to react to the yogurt culture you'll use to start your batch. I use whole milk, but if you'd like to use 2%, you can add 1/4 cup of powdered milk to thicken it a bit. Just read labels; ultra-pasteurized milk usually proudly boasts its sterile state somewhere on the carton.

Third, you'll need yogurt culture to start your batch. Sounds fancy, right? Nope - just a small container of PLAIN yogurt from the store will do! Or you can buy powdered culture from Yogourmet. It looks like this. And I found it at a health food store for half that price, lest you think I'm in cahoots with Amazon! The good news is that once you make a batch, you can take a bit from that batch to make your next batch, and so on down the line...about seven times over. So there's absolutely no need to buy a new container of yogurt every time you want to make your own. That would be rather counter-productive, I think.

Finally, you'll need a thermometer, a pot, and a quart canning jar or two so you can store your yogurt.

Ready? You, your family, and your wallet won't regret it! Click here for the recipe.

Saturday, October 2, 2010

It's Planting Time!

A few weeks ago, I bought some discounted fruit trees at a local nursery. So although this post is technically overdue, I still wanted to share some simple planting tips if you should have the urge to plant anything from a small orchard to a lone apple tree.

The best time to plant is in the spring or the fall
Now is the perfect time to plant perennials (plants that come back year after year). With the fall weather, your plants won't be as stressed as they're past the prime growing season.

Choose disease resistant varieties for less care
The tags on fruit trees are usually choc full of information, but won't necessarily tell you which diseases the tree can naturally resist. The word "hardy" is sometimes thrown in there, but the best thing to do is to write down the varieties available and then do some online research. I can say that pears are the easiest of the more popular fruits to grow. Our new ones are a Kieffer and an Orient (which surprisingly, is not an Asian pear), and the plan is that they will someday replace the older pear trees out back.

Some trees are self-pollinating, some aren't and some are in-between
Another tip for planting fruit trees is to find out if they're self-pollinating or not, since many trees need a companion in order to achieve pollination and bear fruit. Our new Elberta peach is partially self-pollinating, but I'd like to get another so that it produces to its fullest potential. Pear trees generally need two different varieties in order to produce fruit, which is why we got two. Finally, we planted a Damson plum, which is self-fertile. I was also excited to find out that the plum tree that's no longer part of this property (and also very old...it went into survival mode and dropped all its fruit early this year) is a Damson! There are several apple and peach tree varieties that are self-pollinating, which is handy if you don't have much space.

Don't bombard yourself with fruit!
If you're planting several fruit trees, try to find varieties that produce over several months, so you won't be bombarded with fruit for two insane weeks in August or something of the sort. Some peach varieties, especially, produce fruit earlier in the summer. I'm quite anxious to plant a couple apple trees, and Pink Lady is on the top of my list because it produces later in the season and is the best. apple. ever.

Okay, got your tree? Plant it!
First, dig a whole that's about twice the size of the pot your plant came in. Not rocket science. When you pack the dirt in, you can add some planting mix from your local nursery. Some plants like this, and some actually thrive in poor soil (like figs), so it's best to check first.


Lots of rocks in the soil here. Byron collected some to fill in the ruts in the gravel driveway.


Next, water your tree. We use rinsed out milk jigs with small holes poked into the bottom. This lets the water seep out slowly, allowing it to penetrate the soil more deeply. It's also handy to use these jugs in a vegetable garden.


Finally, Byron mulched around the trees with pine needles. It's important not to mulch right up to the trunk of the tree; this can promote the spread of disease. Leave several inches around the trunk so it has some breathing room.


If you're planting fruit trees, you should water them with about a gallon and a half of water daily for the first couple weeks to get them established, especially during dry weather. You can tell if you're watering them too much because the bottom leaves will begin to wilt, as opposed to too little, at which time ALL the leaves will begin wilting. And don't be surprised if your tree doesn't bear much - or any - fruit the first year. In fact, some old timers around here told us you shouldn't let it fruit at all the first year, though we haven't researched that. It will usually produce better the second year anyway, and by the third year it probably will have paid for itself. Best of all, you know where your fruit comes from, and it's more or less organic without paying the hefty prices at the grocery store!